성공적인 루틴 관리를 원하시나요? 지금 바로 스토어에서 "루빗"을 검색해보세요!
[ 제가 직접 개발에 참여한 어플입니다 :) ]
와디즈 오픈예정 | 내 손 안의 매니저 루빗 : 습관, 하루 루틴, 할 일까지 관리해드릴게요
내 손 안의 매니저 루빗 : 습관, 하루 루틴, 할 일까지 관리해드릴게요
www.wadiz.kr
오늘 사용할 라이브러리
[1] react-native-comminity/react-native-camera (for 카메라 띄우기, 사진 촬영)
https://github.com/react-native-community/react-native-camera
[
react-native-community/react-native-camera
A Camera component for React Native. Also supports barcode scanning! - react-native-community/react-native-camera
github.com
](https://github.com/react-native-community/react-native-camera)
https://react-native-community.github.io/react-native-camera/
[
React Native Camera · The comprehensive camera module for React Native.
The comprehensive camera module for React Native.
react-native-community.github.io
](https://react-native-community.github.io/react-native-camera/)
더 자세한 Usage는 두번째 링크!
[2] react-native-comminity/cameralroll (for 사진 저장)
https://github.com/react-native-community/react-native-cameraroll
[
react-native-community/react-native-cameraroll
CameraRoll is a react-native native module that provides access to the local camera roll or photo library. - react-native-community/react-native-cameraroll
github.com
](https://github.com/react-native-community/react-native-cameraroll)
0) 환경
- react-native: 0.61.5
1) 라이브러리 설치 (react-native-camera & cameraroll)
yarn add react-native-camera@git+https://git@github.com/react-native-community/react-native-camera.git @react-native-community/camerarollcd ios && pod install && cd ..2-1) [iOS] Info.plist에 추가
    <key>NSCameraUsageDescription</key>
      <string>Camera를 사용합니다</string>
2-2) [Android] AndroidManifest.xml에 추가
<uses-permission android:name="android.permission.CAMERA" />3-1) Usage - Camera 띄우기
import {RNCamera} from 'react-native-camera';

<RNCamera
  style={{width: 200, height: 200}}
  type={RNCamera.Constants.Type.back}
  captureAudio={false}
/>
- captureAudio 를 써주지 않으면 크래시가 난다.
- type은 전면/후면 카메라. RNCamera.Constants.Type.back를 쓰면 후면, RNCamera.Constants.Type.front를 쓰면 전면 카메라를 이용할 수 있다
3-2) Usage - 사진 찍기
  import React from 'react';
  import styled from 'styled-components';
  import {RNCamera} from 'react-native-camera';

  const View = styled.View`
  flex: 1;
  justify-content: center;
  align-items: center;
`;

const Button = styled.View`
  width: 100px;
  height: 100px;
  border-radius: 50px;
  border: 10px solid ${styles.lightGrey}
  background-color: pink;
`;

const Touchable = styled.TouchableOpacity``;

  const TakePhoto = () => {
      const cameraRef = React.useRef(null); // useRef로 camera를 위한 ref를 하나 만들어주고

    const takePhoto = async () => {
      console.log('cameraRef', cameraRef);
      if (cameraRef) {
        const data = await cameraRef.current.takePictureAsync({
            quality: 1,
            exif: true,
        });
        console.log('😻 data', data);
      }
    };

      return (
        <>
            <RNCamera
              ref={cameraRef}
              style={{
                width: 200,
                height: 200,
              }}
              captureAudio={false} />
            <View>
              <Touchable onPress={takePhoto}>
                <Button />
              </Touchable>
            </View>
         </>
    )
  }
(스타일링은 스타일 컴포넌트를 썼는데, StyleSheet를 써주셔도 무방합니다. 개인의 취향대로!! 저는 스타일 컴포넌트를 쓰니까 컴포넌트가 한눈에 들어와서 이걸 써요)
버튼을 눌러서 카메라를 찍어보면 콘솔은 이렇게 찍힘

https://react-native-community.github.io/react-native-camera/docs/api#takePictureAsync()
여기서 takePictureAsync() 부분을 그대로 썼고,
TakePictureOptions 을 매개변수로 넣어 사진 옵션을 설정할 수도 있음.
interface TakePictureOptions {
  quality?: number;
  orientation?: keyof Orientation | OrientationNumber;
  base64?: boolean;
  exif?: boolean;
  width?: number;
  mirrorImage?: boolean;
  doNotSave?: boolean;
  pauseAfterCapture?: boolean;
  writeExif?: boolean | { [name: string]: any };

  /** Android only */
  fixOrientation?: boolean;

  /** iOS only */
  forceUpOrientation?: boolean;
}
3-3) Usage - 사진 저장
import CameraRoll from "@react-native-community/cameraroll";이제 CameraRoll을 쓰자!
3-2에서 사용했던 takePhoto 함수
  const takePhoto = async () => {
    console.log('cameraRef', cameraRef);
    if (cameraRef) {
      const data = await cameraRef.current.takePictureAsync({
        quality: 1,
        exif: true,
      });
      console.log('😻 data', data.uri);

      // add 4 lines below
      if (data) {
        const result = await CameraRoll.saveToCameraRoll(data.uri);
        console.log('🐤result', result);
      }

    }
  };
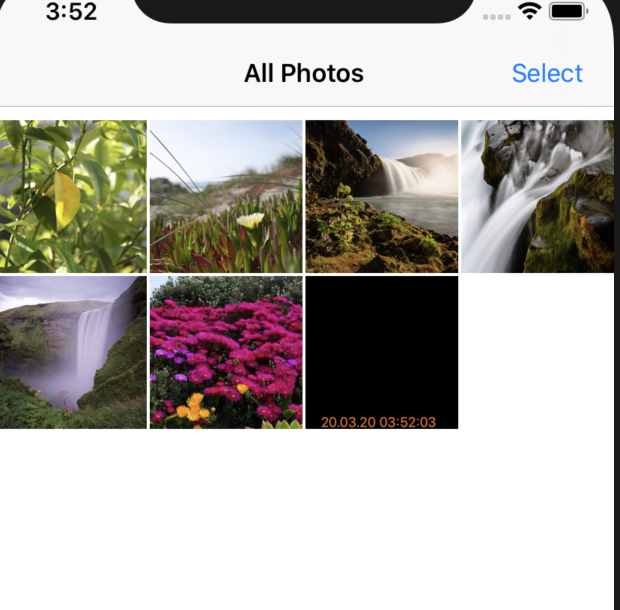
에 갤러리에 이미지 저장하는 4줄 코드 추가! saveToCameraRoll API를 사용하면 된다.
(200819 추가:
*@react-native-community/cameraroll: 4.0.0 버전에서는 *
saveToCameraRoll 대신 save 함수를 쓰라고 한다.)


아주 간단하다!!!
=======================
- 갤러리에서 사진을 가져오는 방법도 궁금하시다면 아래 포스팅을 참고해주세요!
https://coding-dahee.tistory.com/146
[
[React Native] 갤러리에서 사진 가져오기 (iOS)
react-native: 0.61.5 갤러리에서 사진을 가져오려면 camera 권한이 필요함. 1) PHOTO_LIBRARY 권한 요청 https://coding-dahee.tistory.com/145 [React Native] react-native-permission 사용법 https://github.c..
coding-dahee.tistory.com
](https://coding-dahee.tistory.com/146)
'Solve Problem > React Native' 카테고리의 다른 글
| [React Native] react-native-svg 사용법 (점과 점 사이를 선으로 긋는 애니메이션 구현하기) (0) | 2020.03.23 |
|---|---|
| [React Native] 휴대폰/시뮬레이터 화면의 총 가로/세로 길이를 알아내는 법! => Dimensions (0) | 2020.03.19 |
| [React Native] 갤러리에서 사진 가져오기 (iOS) (8) | 2020.03.19 |
| [React Native] react-native-permission 사용법 (0) | 2020.03.19 |
| [React Native] NFC 태그 시 앱/어플 실행시키는 방법 (Android 위주) (10) | 2020.03.18 |